Disclosure
This post is sponsored by Florida Strawberry Growers Association in conjunction with a social media campaign through Sunday Supper LLC. All opinions are my own.Sunday Supper
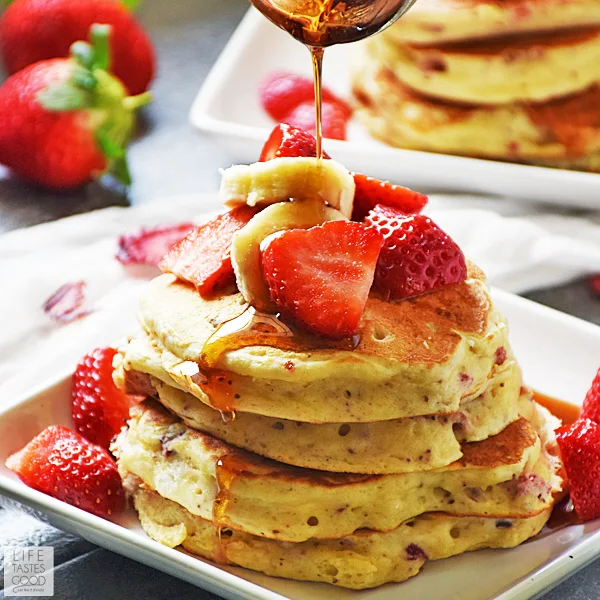
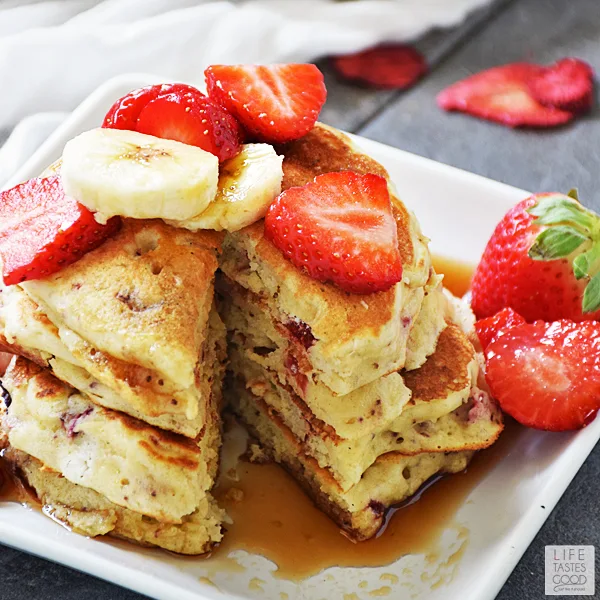
Today, the Sunday Supper Tastemakers are partnering with the Florida Strawberry Growers Association to share tutorials on how to preserve strawberries, in addition to sharing recipes that use preserved strawberries like my Strawberry Pancakes Recipe. Florida strawberry season is from November to April, so now is the time to stock up and preserve those luscious berries to enjoy long after the season is over!Why Preserve Strawberries
Why not?! Fresh strawberries can be preserved by freezing, drying, canning, or pickling. The variety of ways to preserve strawberries gives you lots of options for enjoying them throughout the year when the season is over. I like that!Now, I realize you can get those other berries grown outside of Florida, but I also know they don't even come close to the quality of a Florida strawberry. From Florida to Canada and places in between, anyone who's ever eaten a Florida strawberry knows that Florida's unique growing conditions produces the sweetest, juiciest strawberries around! No other strawberries compare, so now is the time to get to the farms and pick a bunch of strawberries, or if you're not the strawberry picking type, head on out to your local grocery store to stock up so you can preserve those beautiful berries every which way you can.
In my recipe I show you how to make dried strawberries. Sliced strawberries can be dried easily in your oven or a dehydrator. Dried strawberries are a tasty snack kids will love. They are similar to fruit roll-ups, but much healthier without any added sugar! Dried strawberries can also be used in baking like my fluffy Strawberry Pancakes Recipe. Using fresh strawberries in baking can make the end result soggy, so I love to have dried strawberries on hand for things like cakes, quick breads, and cookies.
Homemade Strawberry Pancake mix makes a thoughtful gift from the kitchen too. Add the dry ingredients and the chopped dried strawberries to a mason jar. Attach a note with the rest of the ingredient list and the instructions for a tasty gift or just to keep on hand in the pantry to make quick work of breakfast any day of the week!
U-Pick Strawberry Farms
Have you ever had the pleasure of standing in the middle of a strawberry field surrounded by lush, red berries not knowing even where to start picking?! It's a glorious problem to have <smile>. Strawberry picking is a great way to spend a day with the family. There are some strawberry u-pick farms in Florida open all season, however, commercial farms wait until the end of the season to open up to the public. Visit the Florida Strawberry website for more information on U-Pick Strawberry Farms and get great tips for when you head out to the strawberry fields.Just the thought of strawberry picking brings back such great memories for this mom. I remember taking Madison to the strawberry field down the road from just about the time she could walk! She was so cute running through the rows of berry-filled plants eating more than was going in her basket.
I miss those days so much y'all! Madison is about 5 years old in the picture above. She's the older one in the middle. The two younger ones are our good friends and neighbors. These three grew up together. How great would it be to get them together to recreate this picture some day?! Of the many photos we have of these three kids, this is one of my faves!
How to Make Dried Strawberries
- Purchase (or pick) fresh, ripe berries. Discard any berries that might be a little mushy and overripe
- Preheat your oven to as low as it will go. I was able to set my oven temperature to 170°F
- Wash and dry the strawberries
- Line baking sheets with parchment paper. Be sure to use parchment paper. Wax paper is NOT a good substitute! (I recommend doing as many trays as you can at one time as the drying process takes a while)
- Slice the leafy top off the strawberries and slice each berry from top to bottom into 1/4" rounds. Some berries might be shaped funny, like the one below that looked like lips when I sliced it from top to bottom :). That's totally fine!
- Place strawberry slices onto parchment paper in a single layer. Continue until all strawberries are sliced and in a single layer on baking sheets
- Bake in the preheated oven for about 4 hours. Baking time may vary depending on how thick or thin your strawberries are sliced, as well as your oven temperature and if you have a convection oven or not. 4-5 hours works in most cases for me
- When the strawberries are dried they will look like they are stuck to the parchment paper, but actually, they are very easy to peel off the paper
- Carefully remove each dried strawberry. The strawberries will be pliable, but they should not be sticky or feel wet.
- Test for dryness: If you are unsure if the strawberries are dried sufficiently for storage, cut a few in half to test for dryness. There should be no visible moisture and you should not be able to squeeze any moisture from them. If you fold a piece in half, it should not stick to itself. You might have to put some back in the oven to finish drying out. Dried strawberries can be stored in an airtight container for up to a year. NOTE: Strawberries have a lot of water in them, so they shrink down quite a bit when dried. Be sure to dry several trays at once to have a good stock of dried fruit.
Recipe Prep Tips
- See my photo tutorial below the recipe for a visual reference
- Gather your ingredients
- Use a high powdered blender or a small food chopper to make quick work of chopping up the dried strawberries. I use my Smart Stick with the food chopper and it works well.
- If you don't have buttermilk or just need to use up some milk in the fridge, you can measure out 1 1/2 tablespoons white vinegar or lemon juice and then add enough milk to measure 1 1/2 cups. Stir, then let stand for 5 minutes. This is a good substitute for the buttermilk in this recipe
- No over-mixing allowed! Lumps are okay in the batter for this recipe.
- To achieve a beautiful golden brown pancake, I pour a little vegetable oil on a paper towel and coat the heated pan. I recommend using tongs to hold the paper towel so you don't burn your fingers! The oil should just coat the pan. You don't want the oil to pool at all as this will result in greasy, blotchy pancakes and that would be sad!!
- Use about 1/4 cup batter per pancake and cook until bubbles start to appear on the surface. Don't try to move the pancakes around while cooking. Let them cook until bubbles appear all over the surface and then flip and let them cook again for about another minute. Resist the urge to press down on the pancake after flipping! This will give you a nice brown crust on the outside and a fluffy inside. Pancake perfection!
Strawberry Pancakes Recipe
Published 03/05/2017

Ingredients
- 2 cups all-purpose flour
- 1/4 cup sugar
- 2 teaspoons baking powder
- 1 teaspoon baking soda
- 1 teaspoon salt
- 1 1/2 cups buttermilk (No buttermilk? No problem! Refer to Recipe Prep Tips above for a good substitute)
- 2 eggs
- 1 teaspoon pure vanilla extract
- 2 tablespoons unsalted butter, melted
- 1 cup dried strawberries, chopped
- Vegetable oil
- Fresh fruit for topping (optional)
- Pure maple syrup
Instructions
- Heat a cast-iron skillet or griddle to medium heat. A stainless steel skillet will work nicely too, but try to avoid non-stick. I've found the pancakes don't get a nice crisp, golden outside when using non-stick.
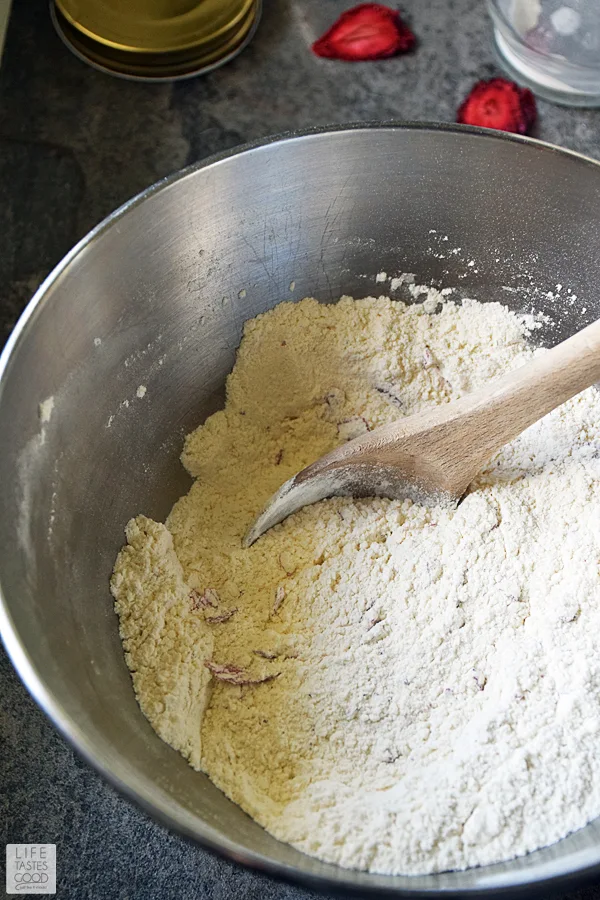
- While the skillet is heating, mix 2 cups all-purpose flour, 1/4 cup sugar, 2 teaspoons baking powder, 1 teaspoon baking soda, and 1 teaspoon salt in a large mixing bowl.
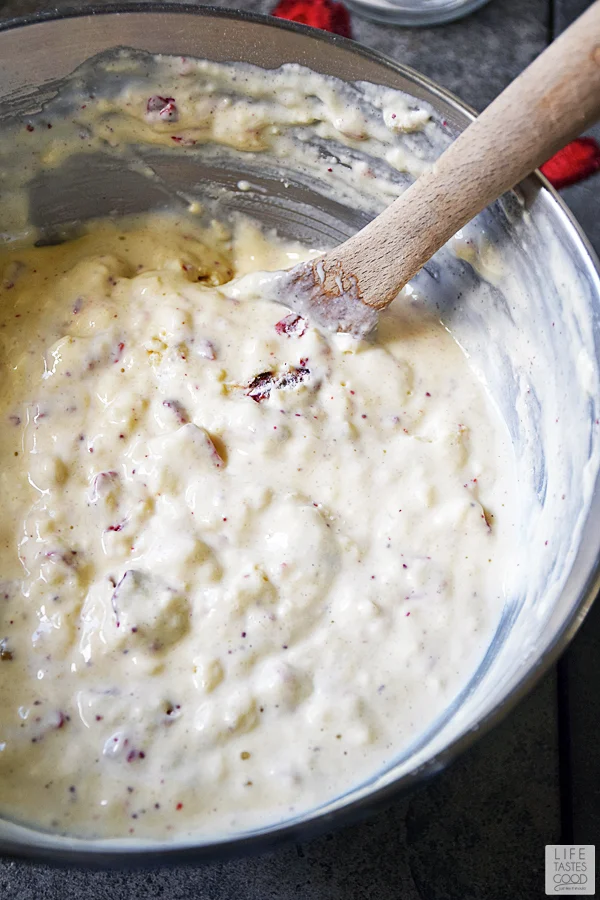
- Next, whisk 2 eggs into 1 1/2 cups buttermilk and add 1 teaspoon vanilla extract along with 2 tablespoons melted butter. Whisk to combine the ingredients. Pour the buttermilk mixture into the dry ingredients and stir until just combined. Be careful not to over mix. Lumps are okay.
- Gently fold the dried strawberries into the batter.
- Pour a little vegetable oil on a paper towel and coat the heated pan. I recommend using tongs to hold the paper towel so you don't burn your fingers! The oil should just coat the pan. You don't want the oil to pool at all as this will result in greasy, blotchy pancakes.
- Spoon about 1/4 cup of batter into skillet per pancake and cook, undisturbed, for about 2 to 3 minutes or until bubbles appear all over the surface of the pancakes.
- Flip over and continue to cook for about 1 minute longer. Please don't press down on the pancakes at any time! We want fluffy pancakes! Remove pancakes and keep warm while you finish making the rest of the pancakes. Remember to re-oil the pan in the same manner prior to putting new batter in the pan.
- Serve with fresh fruit if desired and pure maple syrup. Enjoy!
- To store pancakes for later use, cool them completely and store in an airtight container until ready to use.
Prep Time: 10 mins.
Total time: 30 mins.
Join me in following Florida Strawberry on
How-To Recipe Photo Tutorial
Heat a cast-iron skillet or griddle to medium heat. Chop the dried strawberriesWhile the skillet is heating, mix 2 cups all-purpose flour, 1/4 cup sugar, 2 teaspoons baking powder, 1 teaspoon baking soda, and 1 teaspoon salt in a large mixing bowl.
Next, whisk 2 eggs into 1 1/2 cups buttermilk and add 1 teaspoon vanilla extract along with 2 tablespoons melted butter. Whisk to combine the ingredients. Pour the buttermilk mixture into the dry ingredients,
Mix until just combined and gently fold in dried strawberries
Oil skillet lightly and pour batter into hot skillet about 1/4 cup of batter per pancake
Wait for bubbles to form on the surface of the pancakes and then flip over. Resist the urge to press down on the pancakes. We want them to be fluffy! Cook for 2-3 more minutes until golden brown
Serve with fresh fruit if desired and pure maple syrup. Enjoy!


No comments:
Post a Comment
Thank you so much for visiting and sharing your thoughts! Comments are moderated, so I don't miss anything. I like to read each and every one!
When you leave a comment on a blog post, please be aware that the comment is then public and visible to anyone who reads the comment section. Your email address is never shared or disclosed, but your name and comment will be visible to others. You may choose to leave your comment anonymously. It is highly recommended that you avoid leaving detailed personal information in your comments. For more information please read Life Tastes Good's Privacy Policy before leaving a comment > Life Tastes Good's Privacy Policy
I reserve the right to remove comments deemed as inappropriate, threatening, profane, or spammy without notice.
Thanks! I hope it's a great day!! ~Marion